Interested in learning more about this topic and more social and sustainable ways of doing architecture? Apply now for our Postgraduate!
jQuery(function() { _initLayerSlider( ‘#layerslider_20_zvknsy4vfdqj’, {createdWith: ‘6.11.2’, sliderVersion: ‘6.11.2’, skin: ‘v6’, navPrevNext: false, hoverPrevNext: false, navStartStop: false, navButtons: false, showCircleTimer: false, skinsPath: ‘https://criticalconcrete.com/wp-content/plugins/LayerSlider/assets/static/layerslider/skins/’}); });

DISCLAIMER
This article explains how to protect wood from pests, water and fire showing different environmental-friendly techniques
!UPDATE! !UPDATE! !UPDATE! !UPDATE! !UPDATE! !UPDATE! !UPDATE! !UPDATE!
DE BLOWA
UseProtectionLimitationInterior & exterior wood,
termites-infested woodKilling and repelling termites and other pestsIf a change in colour is not appriciated
DE BLOWA is a mixture of proven anti-termite and anti-pest ingredients that we at Critical Concrete used to protect almost all of the wood we use. So far, we haven’t done any long-term research into its effectiveness, but we’re optimistic that it’s a very useful combination because all of the ingredients are individually useful treatments for pests. The name is an abbreviation for the materials it contains:
DEDiatomaceous Earth100 gB
Borax100 gLLinseed Oil3 kgOOrange Oil100 gWAWood Ashes100 g
It is important to shake the mixture well before application, as the ingredients are not dissolving and settling on the bottom of the container. Then the mixture can be easily applied with a brush (or for a larger surface with a paint roller). Users should be aware that DE BLOWA gives the wood a darker shine. If a fine result is required, the excess should be removed a few minutes after brushing with a cloth.
ProTip: If the wood is already infested, it is recommended to briefly pull the wood through fire from all sides to kill the termites. Another option is to inject orange oil into the visible termite tunnels with a syringe. Read more about the single ingredients and techniques in the following article!
Interested in using this technology in your project?
Critical Studio can help!
Learn More!
Introduction
Wood is a versatile and renewable material with a positive carbon footprint, which proves to be a significant construction material in sustainable architecture. Because of its strong and lightweight characteristics and the possibility to be processed and worked easily, it is a good replacement for other, less ecological materials. Additionally, wood is a relatively cheap material and gives any construction a cozy and natural atmosphere.
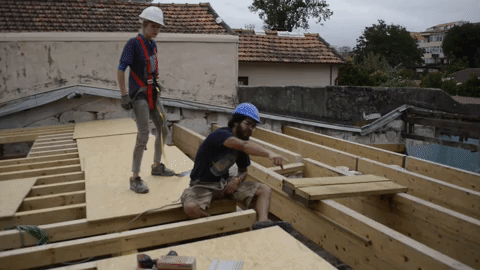
All these advantages make wood one of our most used materials within our projects. For example, instead of concrete or metal, the heavy load of our green roof is carried by strong wooden laminated beams of 12x48cm. Also, reclaimed wooden windows are giving a unique touch to the backyard facade of our workshop.

Beams carrying the green roof

The facade in process
Despite the mentioned advantages, wood as a building material still faces some persistent prejudices, which can lead people to refrain from using wood in their constructions. Many bacteria, fungi and insects find wood appetizing, and humidity and moisture can lead to its early decay. Besides this, a misconception associates wood with being very flammable and thus, a risky building material (when in fact wood retains its strength longer and at much higher temperatures than steel [1]). So, if wood is prepared and treated in an appropriate way, it can be turned into a long-lasting, water- and bacteria-proof as well as fire resistant building material. Many still-standing examples prove that wooden structures can last over centuries and, taking their time of origin into account, that wood can be protected without any artificial products.
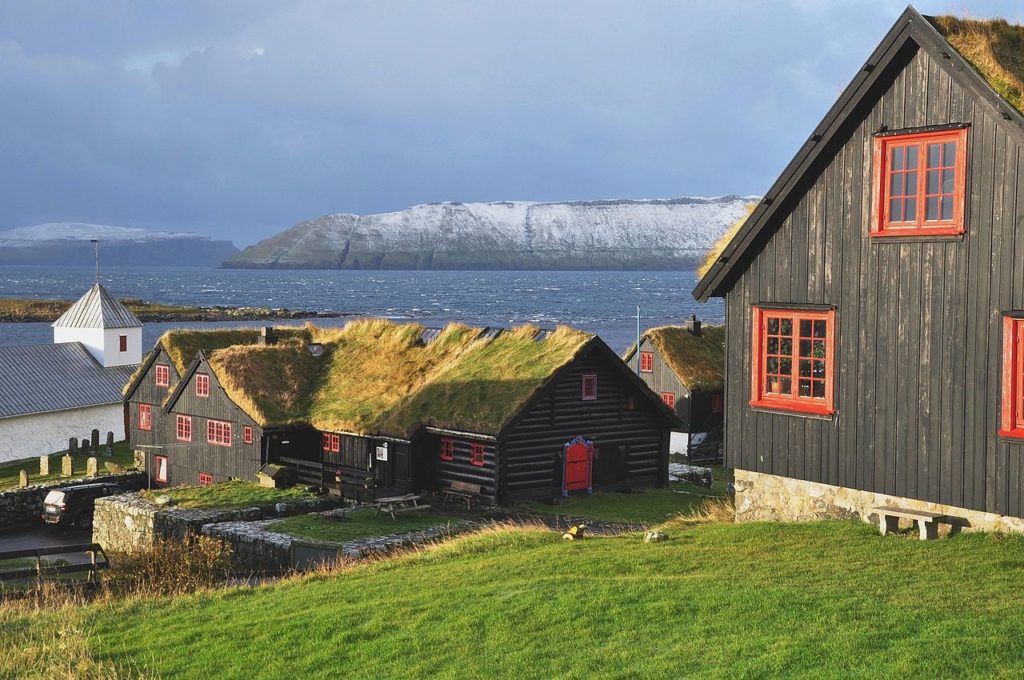
House on the Faroe Islands
When it comes to protecting wood from the mentioned dangers, one can already find a lot of articles on the internet. In this article we avoid the commonly used methods which often involve ingredients harmful to the environment and instead focus on the natural and non-toxic techniques. Besides, we want to promote and facilitate the usage of reclaimed wood. The basics of how to prepare reclaimed wood for the prevention technique can be found at the end of the article.
Based on our experience and research, this article aims to give guidance regarding sustainable and environmentally-friendly techniques to protect wood against pests, humidity and fire. What techniques fit best for your projects can be traced in the decision tree below.

Protection Techniques
Exterior and interior wood are exposed to very different conditions. Whereas both need to stand fire and pest, the wood outside is prone to much more risks as it may have to withstand heavy rain, persistent humidity or high-levels of sunlight radiation. In our projects we usually use applying borax and linseed oil for interior wood and the Japanese technique of charring wood (shou sugi ban) for exterior wood. Depending on the conditions of the property and on the available resources, a combination of techniques may be suitable.
CHARRING WOOD
UseProtectionLimitationExterior and interior wood;
preferably cedar, pine, marble, hemlock or oakagainst humidity
against pests and fungi
enhancing fire-resistance
sunlight-protectionnot suitable for glued and easily cracking wood
Charring Wood is a Japanese technique which originated in the 18th century, known as Shou Sugi Ban. The surface of the wood is burned until carbonation of the surface. The finished result is called Yakisugi. We already published an article about the technique’s history and contemporary use in architecture today, check here.
Counter-intuitively, charring wood has several astonishing advantages without involving any chemicals. The idea is to burn the surface of the wood without combusting the whole piece. Besides giving the material an interesting and unique look, the process lead to a triple protection:
fire protection – this might seem counter-intuitive, but the burning of the surface starts a carbonation of the material and thus lower the thermal conductivity. The treated material will take more time to burn in case of a fire than the regular wood.
termite and mold protection – burning wood destroys the nutritional value to insects and fungi, that regular wood gives to these species. Thus it helps to prevent the propagation of pests.
water protection – the enhanced carbonation gives the charred layer a waterproof resistance, as water slips on burned wood like over an oily surface.
TRADITIONAL STYLE
(suitable for a certain amount of similar boards)
Traditionally the technique is used with Japanese cedar. Cedar is usually the easiest species to burn because of its natural chemical properties and wide grain patterns, making it a more porous wood. In the last few years, the technique has been popularized in western countries and extended to other species of wood like pine, hemlock, maple, or oak. We used pine and beech, but we experienced that these species tend to show cracks when charring. Before burning other species of wood than the ones mentioned above, it is advised to research on previous experiences or make small prototypes. It needs to be mentioned, that once the piece gets charred, it may contract slightly and change its shape as it loses humidity. If working with very precise measurements, this needs to be kept in mind!
Following, the article is highlighting different approaches to do the burning process. For both it is recommended to choose a well-ventilated place, preferably outside, but to avoid breezes. Safety measures should include a nearby fire extinguisher, a bucket of water as well as fire-resistant gloves. Wearing flammable clothes like polyester, sawdust or any flammable items within the close surrounding must be absolutely avoided.
Traditionally in Japan, shou sugi ban is performed by bonding three planks of wood to form a long triangle and starting a fire in the resulting tube. This technique is suitable to char a bigger amount of similar boards (e.g. for cladding). The easiest way to create this triangle is to place the three boards next to each other on the ground with facing the sides to be charred upside and then folding the two outside boards upwards. The triangle can be easily fixed with wire.
One possibility is to put the triangle on a non flammable floor and start the fire at the opening at one side of the triangle. In the best case, the fire spreads over within the whole tube and it will take a few minutes to char the surfaces of the wood. Once the surface is sufficiently burned, the planks are separated and thrown to the ground to stop the burning [2]. The other possibility is to start the fire while the triangle is standing up. Therefore a stable and fire-resistant base (e.g using bricks) is advisable, best next to an also fire-resistant wall. Besides, a fire-resisting spot where the hot and probably still burning triangles can be placed later, needs to be prepared. The wooden triangle can be placed in a slight angle to the wall and the fire can be started inside the lower opening of the triangle. It is also possible to put a grill on the fire-resistant base and start a fire in there, keeping the fire slightly smaller than the hole of the triangle. That way the triangles can be just put on top of the fire and the process will be started. Once the bottom part of the tube catches fire, the fire will make its way to the top. After some minutes fire shoots will be visible on the top and after waiting another minute the triangle can be removed with fire tongs. Once the wood is placed on the prepared spot, the fire can be hosed off with water [3].
As it is can be an unhandy task to fix and loosen the triangles, we are working on a technique to facilitate the process. We are building a burning station, where you can easily put wooden boards and start a fire underneath. When the station will be refined, we will share the methodology and tools in another short article and in a YouTube-Video!
ADAPTED STYLE WITH A HANDHELD BLOW TORCH
(suitable for every form)
If the wood does not come in similar boards or if you do not feel comfortable with the traditional method, the wood can also be charred using a handheld propane blowtorch. For many tasks we worked with this method, for example burning the windows for the facade. Precautions for this method include the mentioned safety measures and the preparation of a fire-resistant spot to place the wood during and after the process.
Starting the process, the torch needs to be lit and the gas opened to the full, so the fire appears more in a bluish colour, meaning it is more concentrated and strong. A good distance between torch and wood lays between 10-15 cm, held in a relatively straight angle. (The distance depends on the torch, but it should be around the right distance when the top of the touching blue fire separates into orange flames).

Burning process with a handheld blow torch
It is recommended to move the torch slowly over the surfaces. In the first seconds, the grains will be highlighted in a darker colour and after the whole surface will turn darker. To get the full protection characteristics, the surfaces should turn completely black and the very first layer should start to get porous. After finishing all the surfaces, the wood needs to cool down.

The burning process

Charred board
FINAL FINISHING FOR CHARRED WOOD
(applicable for traditional and hand torch technique)
After charring the wood, one can clean it softly using a standard wire brush to remove the most superficial char and create a non porous surface, using the brush in the direction of the wood grain. This task needs some precaution. If the wood is brushed too much, its pores will be opened up again and thus the water protection layer might be lost. It is enough if the excess of the burn is removed and the texture of the drains become slightly visible. After the surface can be cleaned with a cloth or water or by using an air compressor. As final coating applying linseed oil is recommended (see the advantages of linseed oil more up in the article).
CRITICAL CONCRETE CHARRING STATION
(Shou Sugi Ban without gas)
At Critical Concrete, we wanted to build up a tool with commonly available materials which enables us on the one side to charr wood of different sizes and forms effectively, but on the other hand, keep the process at very little risk and environmentally-friendly. Check out our Video about our very own Shou Sugi Ban Charring Station!
BORAX
UseProtectionLimitationInterior woodagainst pests and fungi
against humiditynot suitable for exterior wood (only combined with another technique or with a weather-proof resistant wood spieces)

Borax Crystals
Borax is composed of naturally occurring minerals that usually comes as a white powder, consisting of soft and colorless crystals that will dissolve in water. The structure of the boron, salt and oxygen molecules inhibit the metabolic processes of many organisms and therefore borax disinfects and kills unwanted pests and insects [4].
Be aware, that even if borax is a completely natural product, it doesn’t mean it is completely safe to manipulate. For sensitive people, contact with borax may lead to skin or eye irritation [5]. Even though borax enhances the woods protection against humidity, borate protections are only suitable for indoor wood that is protected from weather.
To prepare the solution, the mineral needs to be dissolved with water. We experimented on different percentages and concluded that the mix of 10% of Borax and accordingly 90% of water seems to be the most suitable division. When doing the mix, the water should have a temperature of around 40 degrees, so the mineral dissolves faster and in a higher quantity into the water.
Before applying the borax-mix, the wood needs to be cleaned with a wet but tightly squeezed fabric (to prevent the wood from absorbing more water) to remove dust and dirt. Just before putting the borax-water mixture, it has to be stirred again, because the solution will start settling after some time. To ensure not to apply too much water to the wood and to avoid running noses, it is recommended to wipe off any excess liquid of the paintbrush. To guarantee the effect of the borax minerals, a preferably homogeneous coverage is important. The borax must be fixed with a layer of oil, stain, lacquer or wax. (Look at the next step where we explain why and how you should use linseed).
We have to admit that using Borax as a termite repellent is the best solution we found so far, but that from a sustainable point of view it is far from perfect. The biggest and commercially most important sources of Borax are found in California and Turkey; minor resources can be found in Romania, Bolivia, Chile and Tibet. For us in Portugal that means on the one hand long transportation ways and its unsustainable consequences. But on the other hand and probably much worse the exploration of the minerals from deep layers in the earth can cause immense and devastating damage to nature and landscape. For this reason we are investigating alternatives such as wood ash mixes.
ORANGE OIL
UseProtectionLimitationInterior & exterior wood,
termites-infested woodagainst dry wood termites
Besides borax, orange oil has to be proven environmentally friendly repellent. Deriving from the skin of an orange peel it saturates the wood and gives it a shiny appearance. Thus the efficiency of orange oil against termites is debated. Some sources declare that it kills dry wood termites, but it fails to fight subterranean termites [6]. We applied little amounts of orange oil several times in a row to localized termite infections with a serine and in our case orange oil proved to be very effective. Orange oil is expensive (4 liters for around 100 €) but you never need a big quantity. For small surfaces and already infested areas it is a proper substitute for borax.
In our project we also use 5% mix of orange oil with linseed oil to protect our interior wood from future infestation. But bear in mind that if the borax will remain on your wood permanently, the orange oil would probably slowly be absorbed and loose effect with time. To our understanding it works better as a treatment than as a preventive measure.
LINSEED OIL
UseProtectionLimitationInterior & exterior Woodagainst humidity
sunlight-protection
Linseed oil exhibits many advantages and thanks to its non-toxicity and its environmentally-friendly characteristics is coming back into force lately. It can be used inside and outdoors and act as a protection for water and sunlight [7].
It penetrates deep into the wood, so it does not only saturate the surface but the whole piece of wood. It is also suitable to lock the layer of borax. It lends a golden hue to the wood which will turn to amber over time. The colour is a question of taste and due to its long drying time linseed oil may not be everyone’s favorite. But in fact, it is possible to reduce drying time by using double boiled or polymerized linseed oil [8].

Comparison between a beam with and a beam without linseed oil
To apply linseed oil is very easy, a surplus of oil needs to be wiped off from the brush before applying it to the whole wooden surface and after it needs two to three days to be completely absorbed by the wood.
Linseed oil has the advantage that it penetrates relatively deeply into the wood. But it is also possible to replace all the air contained in the wood with linseed oil. The technique uses first a vacuum to cause the air in the wood to be drawn out, followed by pressuring warmed up linseed oil into the wood structure. Once the oil has hardened, the wood cells should be prevented from absorbing any moisture. For now, this technique is common among instrument makers; at Critical Concrete we did not have the chance to experiment with it so far, but we will do in a close future (stay tuned for upcoming articles).
WOOD VACUUM STABILIZATION
Usually, this technique is done by using a sealable container and a vacuum-pump. The container is filled up with linseed oil, some sources recommend a 2:1-mixture of linseed oil and turpentin. One or more wooden pieces are put into the oil, the container is sealed and and the vacuum pump is started, going to a maximum pressure of 90 kPA (for less fragile parts the optimal maximum vacuum pressure needs to be evaluated). The second phase involves compressing the air up to 75 psi and isolating the container. It is recommended to heat the oil to a temperature around 35 degrees to prevent the oil from “boiling”. The whole thing should be left like this for about a day. After, the heating can be turned down and before starting the depression the oil should cool down for a few hours. When everything has cooled down, the pieces can be taken out of the oil. It is necessary to keep the wooden pieces in a cold environment and give them a daily wipe for the following days, as the oil may continue to sweat and thus leaving ugly patches which will later on be hard to remove. After this activity has terminated, the pieces can be removed to a warmer place to speed up the drying process (which can also involve many days). It is still questioned whether this technique is suitable for bigger pieces of wood, as we could only find examples for smaller pieces (as seen in a construction context). It has to be evaluated whether the oil can penetrate completely into big pieces of wood and if yes, if it can also dry completely. Besides making the wood waterproof, the vacuum pressure treatment adds to weight, stability and resilience of the wood [9].
LIME AND WOODEN ASHES
UseProtectionLimitationContact between ground and woodagainst subterranean termitesnot applicable on wood
Both lime and wooden ashes are alkaline, and termites do not prefer alkaline environments. This mixture was already used in ancient China, where it was usually spread on the soil to kill subterranean termites, which can also be helpful to avoid wooden construction to get in contact with termites via the soil [10]. Besides, we found some suggestions to put ashes directly in holes that derive from termites. Also a study from Uganda shows that wooden ashes (sometimes mixed with pepper or cow urine) applied to the trees and soils kept the termites away [11]. For now it seems like it is not directly applicable to wooden surfaces, because the wood’s ph is usually acidic and these of ashes and lime are alkaline. Whenever acidic and alkaline components come into contact and water is present a chemical reaction will occur. It might have been possible to predict the reaction if bringing together only a few inorganic compounds, but wood consists of a multitude of organic compounds which differ even from species to species [12]. Thus, it might be an interesting field to experiment in the future.
DDITIONAL OPTIONS SUPPORTING TERMITE-FREE WOODEN CONSTRUCTIONS
Termite-eating Worms and Fungus. There is also the possibility to attack subterranean termites (which might flow over to wooden constructions) while placing a special species of microscopic worms into the soil next to the construction – Nematodes. They come as parasitic roundworms and they will quickly find and enter the host insect’s body and start eating it from the inside. Doing so, they are releasing gut and the termite will suffer from blood poisoning and quickly die. Nematodes will go on to its next victim till they cannot find any host insect anymore and then die. Similar working species of fungus exist, too [13]. If these worms may have any potential to be put directly into a wooden construction or if they will act as a pest themselves (as for example Bursaphelenchus xylophilus does to pine trees)needs further examination.
Diatomaceous Earth. Consisting of small decayed organisms, which have dried out and become razor sharp cut the sensitive, outer shell membranes of small insects. After the insect’s shell is sliced, the extremely dry particles of the diatomaceous earth actively dehydrate and thus kill the insect in a short time [14]. Diatomaceous Earth is commonly used to kill existing pests by spraying the powder to the infested areas. If and how it is applicable as a preventive protection to be applied to the wood needs to be examined.
Sunlight. Termites might die when they are exposed to sun radiation and heat. So, furniture or pieces of wood which are mobile and where indicators of termite infestation can be indicated, might be without termites after they were put for some time into direct sun [15].
Termite traps. The favorite dish of a termite is cellulose, that is why they are craving for wood and everything which is somehow made out of wood. Cardboard boxes provide an ample amount of cellulose. If the infestation of termites is apprehend, setting out a wettendend cardboard box can lure them out of their hiding. This way will probably not lead to the total extinction of the termites in one place and it needs repetition from time to time, but every termite removed is a good termite [16].
Protective measurements deriving from the construction details
The protection of wood can be enhanced the way it is – installed in the construction. On vertical boards the water can flow more easily and thus will penetrate less into the structure. Another strategy can be to work with a ventilated wood and batten structure, securing a constant ventilation on the exposed wood. This is traditionally used in barns and today adapted to many contemporary wooden construction. If possible, exposed joints, screws and nails should be avoided, reduce possible enter spots for humidity and to obviate rusty spots.
Conclusion
Due to its environmentally-friendly characteristics and its easy-to-work with features, wood is one of the most important materials in our projects. To protect this precious material and to enlarge its usable life-circle, we discovered the mentioned techniques as the most suitable for us. One the one hand, those methods enable the protection of wood with commonly used tools or with very little acquisitions. On the other hand, they not just renounce spreading toxic material into the environment, they also prove that wood can be a durable construction material, which can replace other, less sustainable materials. Nonetheless, those techniques are not exclusive when it comes to sustainable and ecological wood protection techniques, but using these methods set incentive for a more sustainable architecture.
Building the green roof structure
BONUS-TRACK
Depending on if and how the wood was used before, the wood may need to be prepared before applying the protection techniques. This possibly includes cleaning and smoothing the wood.
Notice: Before starting to work with wood, it is important to check the humidity of the wood (max. 20% – it is possible to use hygrometer or by comparing the weight of some size and species of wood). If the wood is too wet, it is not possible to work with it, otherwise all the effort will be in vain, you’ll damage your tools, and the wood is probably highly damaged already.
CLEANING THE WOOD
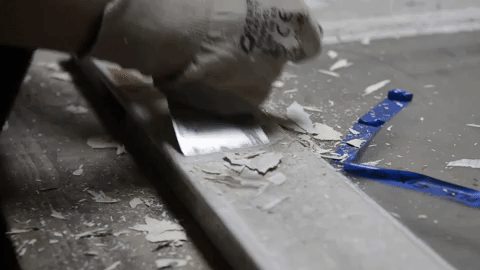
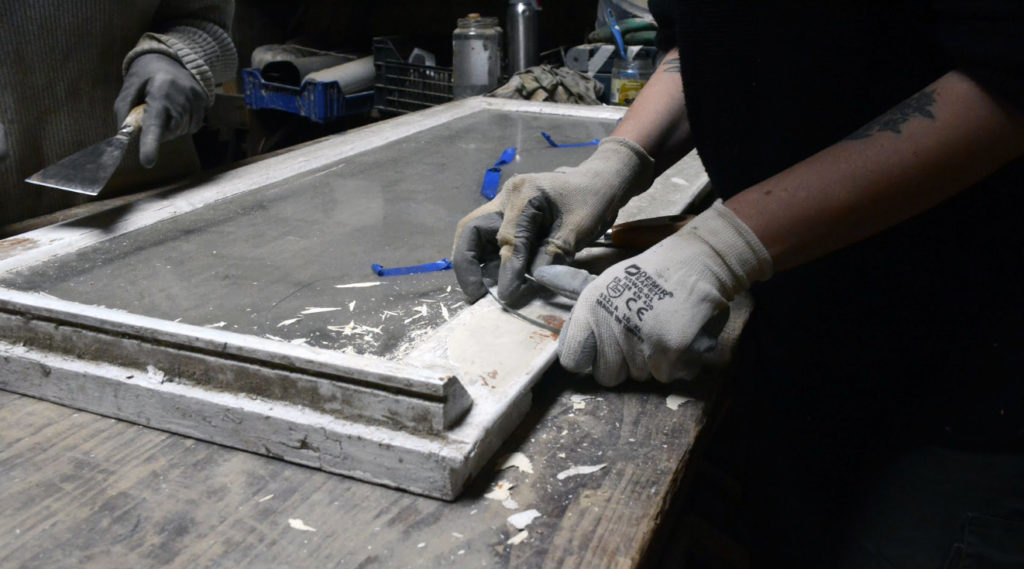
When using leftover wood, it most probably shows traces of its former life, including left-over nails, screws and other applications as well as old (and probably chipped and multilayered) paint. In case this “vintage style” is wanted, it is important to weigh the aspired look against to what extent the wood needs to be protected. Removing the leftover screws, nails and other applications will facilitate the following steps. To get rid of the paint, we suggest two tools: the classical scraper or a piece of broken glass.
When using the scraper, it is crucial not to use it in a steep angle, even if this may work more efficiently. Instead using it in a shallow angle and trying to get the scraper under the paint to protect the underlying wood from scratches.
Scraping paint by hand
Measuring
A suitable piece of broken glass for this task has a curved side. For some kind of paint, thinner glass may be more efficient, but the thinner the glass is the more likely it is to break. Also it may be more handy when the piece of glass is a bit bigger (around 10-20cm), but depending on its thickness it is also more likely to break.
It may appear that it is easier to do this task without gloves, as it brings more precision in your hands. Before taking off the gloves, changing to more tight-fit gloves can probably solve this issue.
Changing between scraper and different pieces of broken glass, in some areas one or the other may work better. Independently of the chosen tool, the scraping off of old paint can be either an easy task if the paint happens to be brittle and already chipping, or in the worst case it can take hours.
SMOOTHENING THE WOOD
After removing the nails the wood probably looks dirty, but also new wood may also have a layer of dirt, bark or mold covering its surface. It is important to clean the surface well to make the wood receptive to the following wood-protection treatment, for example to ensure a better infiltration of pest-protection and oil. An additional advantage of the removing of the first layers is the beautified appearance of the new wood surface.
The removal of the top layers and smoothing of the surface is achieved by sanding or planing. Of course there is the possibility to sand by hand, but unless it is not a very small wooden surface that you need to be protected, it may be really better work with a sanding machine.
While using the sanding-machine, it is crucial to put the sanding patch or belt as flat as possible on the wooden surface (of course as long as this is manageable with the kind of surface you have). It may appear that it works faster and more efficiently when the sanding paper is touching the wood at an angle. But on the one hand it ruins the result as the surface will not turn out straight and bumps can be easily created. On the other hand, it also ruins the sanding pad at the edges.
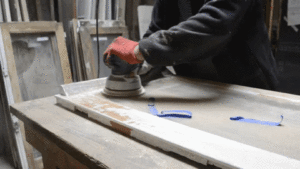
Sanding
Little corners, that cannot be reached with the sanding machine – or while using the machine could come close to very weak parts – need to be sanded by hand, or a multi-tool if you have one! The worn out patches of the sanding machine probably can be used for the parts which need to be sanded by hand.
Now the wood is ready for protection!
Sources
[1] NZ WOOD “Which building material performs better in a fire – wood or steel?”, [Online] available at http://www.nzwood.co.nz/faqs/which-building-material-performs-better-in-a-fire-wood-or-steel/ (Last accessed in January 2020)
[2] Shou Sugi Ban “Shou Sugi Ban 101”, [Online] available at http://shousugiban.com/shou-sugi-ban-101/ (Last accessed in January 2020)
[3] Instructables “Backyard Shou Sugi Ban”, [Online] available at https://www.instructables.com/id/Backyard-Shou-Sugi-Ban/ (Last accessed in January 2020)
[4] ThoughtCo “The Chemistry of How Borax Works as a Cleaner (Sodium Borate)”, [Online] available at https://www.thoughtco.com/how-does-borax-clean-607877 (Last accessed in January 2020)
[5] Healtline “Is Borax toxic?”, [Online] available at https://www.healthline.com/health/is-borax-safe#safety (Last accessed in January 2020)
[6] Networx “Does Orange Oil Work for Termites?”, [Online] available at www.networx.com › article › does-orange-oil-work-for-termites (Last accessed in January 2020)
[7] The Craftsmen’s Blog “How To: Use Boiled Linseed Oil (Safely)”, [Online] available at https://thecraftsmanblog.com/how-to-use-boiled-linseed-oil-safely/ (Last accessed in January 2020)
[8] ARDEC “Linseed oil, a natural solution for Wood Finishing”, [Online] available at https://ardec.ca/en/blog/22/linseed-oil-a-natural-solution-for-wood-finishing (Last accessed in January 2020)
[9] Good Bagpipes “Vacuum and pressure oil treatment of wood”, [Online] available at https://www.goodbagpipes.com/index.php/about-me/writings/pipe-making/131-vacuum-and-pressure-oil-treatment-of-wood (Last accessed in February 2020)
[10] Abdalla House “Termite deterrents”, [Online] available at https://www.abdallahhouse.com/2009/11/termite-deterrents.html (Last accessed in January 2020)
[11]P. Kiwuso, G. Maiteki and J. Okorio “Indigenous methods of controlling termites in agroforestry in Uganda”, 2015, Kampala, Uganda
[12] Passivhaus “LA PRESERVATION DES BOIS DANS LA CONSTRUCTION” [Online] available at https://passivhaus.fr/wp-content/uploads/2017/11/traitementsalternatifsdesboisdeconstruction-1.pdf (Last accessed in January 2020)
[13] Varsity termite and pest control “All-Natural Ways of Eliminating Termites” [Online] available at https://varsitytermiteandpestcontrol.com/natural-ways-eliminating-termites/
[14] Citypests “Diatomaceous Earth for Termites”, [Online] available at https://citypests.com/diatomaceous-earth-for-termites/
[15] Pesthow “How to get rid of termites”, [Online] available at https://www.pesthow.com/how-to-get-rid-of-termites/
[16] Pesthow “How to get rid of termites”, [Online] available at https://www.pesthow.com/how-to-get-rid-of-termites/
[image by Vincent van Zeijst], [Online] available at https://commons.wikimedia.org/wiki/File:Faroe_Islands,Streymoy,_Kirkjub%C3%B8ur(1).jpg (Last accessed in January 2020)
The post Natural Wood Protection first appeared on Critical Concrete.
Did you miss our previous article…
https://www.akbarconcreteworks.com/?p=156